Showing posts with label Ten Thunders. Show all posts

Friday, 28 October 2016

Pandora vs. Shenlong - Steampunk Chores

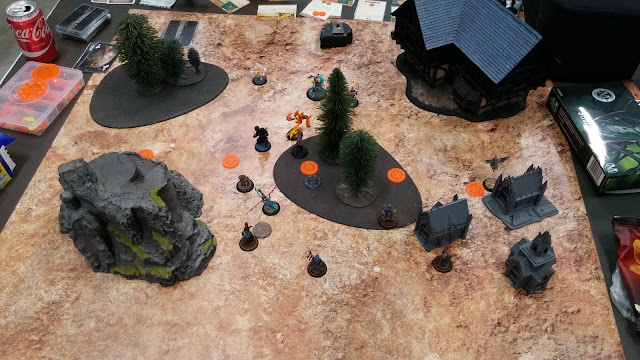
In our first game in Weeks 7 & 8 of the Divergent Paths Event, we played the Child's Encounter - Steampunk Chores. In this Scenario, each Crew would earn VP for delivering at least two Scrap Markers to the Child in the centre of the board each turn. A pile of Scrap to each side of the board on the Centreline provided a source of Scrap Markers.

Scheme Pool: Hunting Party, Catch and Release, Show of Force and Occupy Their Turf

Neverborn:

Pandora with Voices, Aether Connection and Fugue State
Primordial Magic
Spawn Mother
Bad Juju with Eternal Fiend and Malifaux Provides
Doppleganger
Johanna
Will O' The Wisp
Will O' The Wisp

Schemes: Hunting Party, Catch and Release

Ten Thunders:

Shenlong
Sensei Yu
Lone Swordsman
Tengu
Wandering River Monk
Shadow Effigy

Schemes: Convict Labour, Show of Force

Deployment:


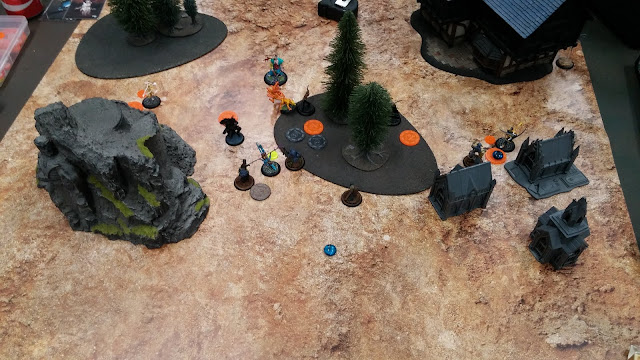
Turn 1 saw both crews advance forwards, with a Wandering River Monk going for each pile of scrap, dropping Scheme Markers on the way (for Convict Labour). The Spawn Mother ran forwards and placed an Egg Marker for one of the Wisps to hatch. Pandora managed to Paralyse the Lone Swordsman and give him Mood Swings, a rather rude combo that alongside the Doppleganger almost guaranteed the Neverborn the first two Activations of Turn 2.


The newly summoned Gupps went to contest the right-hand pile of scrap while the Doppleganger moved up to contest the one on the left, although failed to use her mimicked (1) The Wisps' Call to keep the Wandering River Monk in place, and it wandered off with two Scrap Markers.


The Neverborn took the Initiative on Turn 2, charging the Wandering River Monk with the immortal Bad Juju, leaving it on low health and failing to score for Hunting Party. Pandora activated after the Paralysed Lone Swordsman and used two wins with Incite to push herself into Misery range of the Monk, Lone Swordsman and Shenlong. She attempted to Paralyse the Lone Swordsman again, but realised she was engaged with Shenlong, and Paralysed him instead. Not wanting to give up an easy Hunting Party VP, Pandora left the Wandering River Monk on 1 HP after her Inflicts, with her aura from Fugue State covering the Child Marker in case the Monk managed to get close enough to score.


Meanwhile, the Spawn Mother pumped out some more Gupps and killed a Tengu with a charge, scoring for Hunting Party while the little Swampfiends got to work gathering up Scrap. Sensei Yu attempted to heal the Wandering River Monk with Focus +2, but managed to flip nothing higher than a 3 (yet again, the cards really seemed to despise the Ten Thunders...). The Monk made a break for it anyway, but only managed to deliver one of it's two Scrap Markers, with no cards to cheat with after Pandora's Inflict spam.

The Doppleganger took a Scrap and headed for the centre, and Johanna stepped up to contest the Child Marker - which probably should have terrified Shenlong if either of us had realised he was a Tyrant! The Primordial Magic used it's Nullify to make the Lone Swordsman Insignificant, but also to cause damage from Misery.

With nothing contesting the centre, the Lone Swordsman scored for Show of Force.


The Ten Thunders reflipped Initiative for Turn 3 and won, allowing an angry Lone Swordsman to straight up remove Johanna, hitting his trigger that ignores Hard to Kill. Pandora made him suffer with Misery, taking him down with the help of the Primordial Magic, while the Doppleganger borrowed Bad Juju's Attack Action to deal with a Peasant for Hunting Party before continuing towards the centre to score. Bad Juju, given Slow and pushed backwards by Sensei Yu, did all he could - walk forwards.

The Spawn Mother pumped out even more Gupps and together they dominated the right flank.

Again, with no Neverborn contesting the centre, Sensei Yu scored for Show of Force.


Shenlong managed to shut Pandora down on Turn 4 by preventing her from using Soulstones and leaving her unable to deal with the rest of the attacks coming her way. Not before made him hit himself a few times, though!


The Effigy attempted to run away and avoid giving up points for Hunting Party, but Bad Juju cut it off.


The Doppleganger and one of the Gupps managed to deliver enough Scrap and to score and secured the victory for the Neverborn by getting another from Catch and Release on the last turn- it had been a close game, VP wise, up until this point, despite the heavy losses on the Ten Thunders side.


Thursday, 6 October 2016

Wong vs. Shenlong - Rampage

In the second of this fortnight's Divergent Paths Encounters, Wong faced off against Shenlong. The Encounter was Rampage - the Self-Righteous Man, changed by his passage through The Breach, undergoes a horrific change into a Werewolf, and the Ten Thunders and Gremlins both have plans to try and contain him. A Werewolf Marker starts in the centre of the board, attacking anyone who comes close for 2/4/6 damage and moving into base contact. Players score 1 VP for each Scheme Marker within 3" of the Werewolf at the end of each Turn, and then the Scheme Markers are removed.

Gremlins:

Wong with A Gremlin's Luck, Do Over and Dirty Cheater
Trixiebelle with A Gun For A Lady
Sammy LaCroix with Oooh, Glowy
McTavish (Glowy)
Merris LaCroix
Rooster Rider
Lightning Bug
Stuffed Piglet

Schemes: Plant Evidence, Entourage (Trixiebelle)

Ten Thunders:

Shenlong
Peasant
Sensei Yu
Ama No Zako
Katanaka Sniper
High River Monk
Tengu
Tengu

Schemes: Bodyguard, Line in the Sand

Deployment:


Forgot to take a picture before the Katanaka Sniper, Rooster Rider and Ama No Zako had activated...


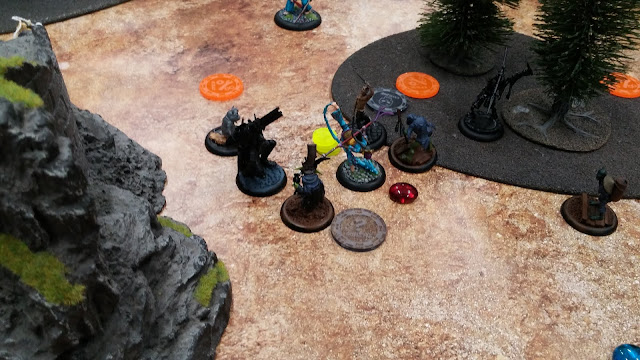
The Katanaka sniper began the game by taking a shot at the Rooster Rider and doing severe damage. The Rider flew forwards and planted a Scheme Marker near the Werewolf, taking cover behind the clocktower. Unfortunately Ama No Zako, unhindered by the severe terrain of the forest and tore the Rider to shreds.
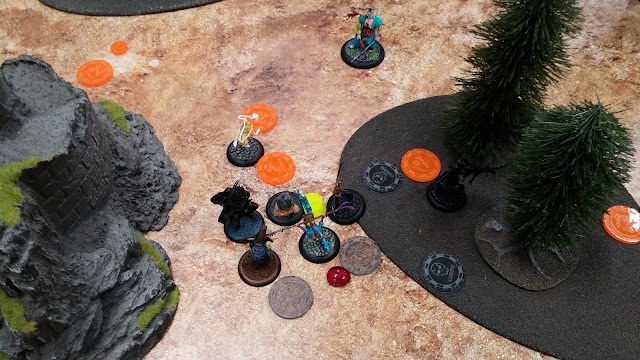


The Tengu and the rest of the Ten Thunders got to work placing Scheme Markers, enraging the Werewolf in the process but luring it in for scoring on Turn 2. Sammy prepared to jump out and Jynx Ama No Zako, while Merris and Trixie dropped Scheme Markers to fuel Wong's fireworks and McTavish blew the injured Tengu away.


At the end of the Turn, Wong placed a scheme marker next to the Werewolf - they wouldn't score this turn, but they'd come in handy later.


McTavish started Turn 2 by jumping out of cover and laying down a Hunting Screen for Wong, who was foolishly in the open. The Katanaka Sniper took the shot anyway, but the sight of a pet Gator put them off!


Sammy ran forwards and tried to Jynx Ama No Zako but failed terribly and had to be 'Lured' away from danger by Trixie.


While Shenlong and the Peasants were busy sweeping, the Stuffed Piglet ran forwards to block a charge lane and annoy the Sensei.


Sensei Yu, undetterred, killed the Stuffed Piglet anyway and wondered off to try and secure Line in the Sand. The death of the Stuffed Piglet allowed the High River Monk to charge Wong, but not before Wong activated himself - running forwards and using his (0) BOOM! to blow up three of the Ten Thunders' Scheme Markers.

Meanwhile, Ama No Zako and the Tengu placed more Scheme Markers for Line in the Sand, and the Lightning Bug and Merris ran in to move the Werewolf and place Scheme Markers to score from the Scenario.


Turn Three started with McTavish spending the entirety of a godly Hand to blow Ama No Zako away, making good use of his (0) and a discarded Rams to take a third shot.


Shenlong, rightly furious, took his anger out on Merris and the Lightning Bug, but not before Merris set a Scheme-running Tengu on fire with one of her molotovs. Trixie got herself into position to start running forwards for Entourage, while Wong used his Poof! trigger to escape combat with the High River Monk, using a Soulstone for a positive flip on his attempt to cast BOOM! only to flip a Black Joker on the positive flip. Oops. If that wasn't bad enough for Wong, the Monk and a Peasant then trapped him in place and set him on fire.


Shenlong began Turn Four by charging the trapped and unable-to-squeal Wong, who somehow managed to survive with Soulstones and Dirty Cheater and Poof! away again, discarding a card to gain Defensive +1 just in case.


Sensei Yu used his push to send the High River Monk after Wong, but McTavish gunned him down before he could get to him. Sammy got to work removing Scheme Markers, turning one into a Stuffed Piglet, while Trixie stole Sensei Yu's Scheme Marker with her (0) Presents? For Me?!


Trixie tried to run into the Ten Thunders Deployment Area, but was stopped by Shenlong and the Sniper, who also took out Wong at last. Sammy continued turning Scheme Markers into Stuffed Piglets while Sensei Yu tried to repair their Line in the Sand.


Finally, Sammy broke cover to plant a Scheme Marker for Plant Explosives, her Stuffed Piglets distracting the Ten Thunders.

At the end of the game, the Gremlins had racked up enough VP from the Werewolf to take the victory!

Wednesday, 7 September 2016

Mah Tucket vs. Asami... vs Ironsides!

Today was supposed to be Week 3 of our Shifting Loyalties Campaign, but due to some absences we ended up playing a three-player Encounter - 'Loot!'

In this Encounter, two of the players had to fight over a Treasure Marker, gaining a hefty amount of VP for holding it at the end. A randomly determined player would be the Wildcard, having a separate, secret Strategy to themselves. Fittingly, the Gremlins were the Wildcard - having to get Scheme Markers close to the Treasure Marker.

As we were quite short on time, and there was a lot going on, this will be more of a 'Highlights' than a 'Battle Report'...!

Gremlins:


Mah Tucket with Know the Terrain, Out for Blood and Dirty Cheater
The Little Lass with Lead-Lined Apron
Trixiebelle with A Gun for a Lady
Lenny with "I'll Love it and Pet it..."
Lightning Bug
Slop Hauler
Bayou Gremlin
Bayou Gremlin

Schemes: Plant Explosives and Cursed Object

Ten Thunders:


Asami Tanaka with A Heavenly Design, Feigned Weakness and Grasping Strands
Amanjaku
Ohaguru Bettari
Shadow Emissary with Shadow Conflux
Wandering River Monk
Bunraku
Wastrel
Tengu
Tengu

Schemes: Power Ritual and Plant Evidence

Arcanists:


Toni Ironsides with Arcane Reservoir, Challenge the Crowd and Iron Determination
Joss with Imbued Energies and Bleeding Edge Tech
The Firestarter with Imbued Energies
Arcane Emissary with Ironclad Conflux
Large Arachnid
Steam Arachnid
Steam Arachnid

Schemes: Bodyguard on the Emissary and Cursed Object

Deployment:


Mah and the Little Lass chose not to advance with "Get Off My Land!", and the Chores for the first round was a Rams, granting +1 MI to all friendly Gremlins.


The Ten Thunders took the first move, cautiously advancing a Wastrel. In response, the Gremlins sent a Rooster flying into the Bunraku and Wandering River Monk, which put out some damage but failed to put either enemy down. Surviving the retaliation, the Rooster was pulled out of combat with Trixiebelle's 'Lure' for the Lightning Bug to heal up by blasting Lenny - only for the Lightning Bug to flip a Black Joker..!


Meanwhile, the Arcanists advanced, running straight for the Treasure Marker, with Ironsides actually sitting on it. The Emissary pulled the Firestarter forwards, who could Reckless and discard Imbued Energies to swoop in and pick up the Marker, even with it needing a (2) Action.

Ignoring the poorly positioned Rooster, who would rampage through the Gremlins if not healed, the Ten Thunders used their Tengu to drop Scheme Markers all along one side of the board.

Lenny prevented the Bunraku from advancing closer by tossing a Piglet in its path, while a panicking, Mah stepped in to solve the Rooster situation, pushing into base contact with the Rooster Rider with her (0) let Mah Handle This and pushing it away towards the Slop Hauler.


Realising she still had three AP left and a target in her sights, she walked up and used her (1) Aim For the Sore Spots, spending a Soulstone and cheating a high Tome to hit the trigger that let immediately charge the Shadow Emissary, whacking it for a ridiculous 10 damage! (I didn't realise at the time that the trigger let her charge as a (1), so she only got two attacks off... not that she didn't do enough damage!) As a bonus, she now had a 3" melee engagement range - trapping two more Ten Thunders in combat! Mah survived the retaliating Dragon, flipping nothing but twelves and thirteens.


Getting the initiative on the second turn, with +1 MI from Chores again, the Gremlins went first. Seeking to stop the Firestarter, the Little Lass charged in with her Medium Sized Spoon, but failed to finish the Firestarter off or stop them from disengaging - allowing them to run off with the Treasure. Ironsides then killed the Little Lass, despite her Lead-Lined Apron. While the Ten Thunders continued dropping Scheme Markers all over the other side of the board, the big hitter of the Arcanists turned towards the Gremlins, zapping the poor fishing Gremlin for two damage, while the Large Arachnid gave a Gremlin a Cursed Object.


The Gremlin Slop Hauler healed the Rooster Rider out of the 'Danger Zone', then Trixiebelle took some shots at the Emissary, hitting a trigger that let her pull the Rooster Rider into base contact with her. This got the Rooster Rider far enough to Reckless and chase after the Firestarter, ready to charge her on the next turn.


The newly summoned Piglet proved his worth by giving a Cursed Object to the Bunraku.


Meanwhile, the Arcanists sent some Steam Arachnids after the Tengu to try and hinder their plans.


Mah finished off the Shadow Emissary, having survived another barrage of attacks with high flips, then whacked the Wandering River Monk to death and damaged the Wastrel, having hit the trigger on Aim For the Sore Spots that let her take an attack after bumping her range to 3" again.


The fisherman Gremlin charged the Arcane Emissary, hoping to prevent it going after the Rooster Rider, and Lenny threw a Piglet into the fray in an attempt to stall it further, hurting the Bayou Gremlin in the process. Joss managed to hand out a Cursed Object to Asami, meaning my Lightning Bug didn't have to try and kill the poor Bayou Gremlin before the Arcanists scored a VP.


On what would be the final turn, the Gremlins cheated the initiative flip (thanks to Trixiebelle's ability), going first and getting to draw a card every time a Gremlin died thanks to the Chores for the turn. The Rooster Rider started the turn by charging the Firestarter, which clung to life with a lot of cheating and Soulstone usage.


Lenny moved into position for Mah to pull herself out of combat, but Ironsides tricked the poor Wp 1 Lenny into moving into combat with her and taking a swing, taking four damage himself from her trigger. Ironsides then pulled the Bettari into combat as well, and ended by doing some more damage to Lenny. Having lost Lenny as a Mah delivery system, Trixiebelle used Reckless and ran forwards to Lure her out of combat instead. The Bayou Gremlin stuck in combat with the Large Arachnid took a swing at it, only for Mah to sacrifice it for a positive flip to all Gremlin melee attacks for the rest of the turn (harsh!). After the Arcane Emissary activated, killing the Pig with his (0), the fisherman Gremlin with a (1) and zapping the Lightning Bug for five damage, leaving three smoking Corpse Markers, Mah activated. Now out of combat, she used Aim For the Sore Spots again, hitting the charge trigger thanks to a Soulstone and a cheated Tome, flinging herself at Ironsides. Flipping and cheating some high Rams, her Critical Strike trigger - buffed further by Lenny's Rams aura - almost took Ironsides out, forcing more Soulstone usage. The Slop Hauler and Piglets took the last activations of the turn, the Hauler running in and dropping a Scheme Marker for Plant Explosives, scoring 2 VP from the Large Arachnid and the Emissary, while the Piglet gave another Cused Object to the poor Bunraku for another VP.


It was at this point that we had to finish. The Gremlins were sitting on the most VP scored during the game, but the Arcanists revealed Bodyguard, scoring a good amount of VP, and the Ten Thunders also scored a healthy amount with their many Scheme Markers. However, having failed to kill the Firestarter, the Arcanists were sitting on another 4 VP from the Strategy. Had we played another turn it would have been another story - not only was there a Rooster Rider in its face, but a summoned Yokai, too...!

Despite running out of time, it was fun to play a three-player Encounter. Not many systems can pull off games with more than two players, especially three, but the Schemes and Strategies of Malifaux seem to solve the usual problem of one player being massively ganged up on.

Mah was definitely MVP for the Gremlins this game, although the Rooster Rider and Trixiebelle were great, as well as Lenny and his Piglet summoning. I'm looking forward to trying them all again in a one-on-one!

Friday, 26 August 2016

Brewmaster vs. Misaki

Had a quick rematch against Misaki today - this time as Brewmaster! I've played him a couple of times before, but not recently. I was going to try Wong, but I haven't got the rest of his Crew together yet, so I hastily threw an accidentally Henchman-heavy list together.

Deployment: Standard Deployment
Strategy: Squatter's Rights
Schemes: Assassinate, Cursed Object, Breakthrough and Plant Explosives

Gremlins:

Brewmaster with Binge, Running Tab and The Good Stuff
Apprentice Wesley
Fingers with Drinking Problem
Francois LaCroix with Team Work
Sammy LaCroix with Hold Their Hair Back and Stilts
Merris LaCroix
Moon Shinobi

Schemes: Breakthrough, Plant Explosives

Ten Thunders:

Misaki with Stalking Bisento and Recalled Training
Shang
Toshiro the Daimyo with Command the Graves
Samurai with Favour of Jigoku
Torokage
Torokage
Punk Zombie
Punk Zombie

Schemes: Assassinate, Plant Explosives

Deployment:


Misaki, Shang, a Torokage and the Samurai took the right side of the Ten Thunders deployment area, while the Daimyo and the rest deployed by the large tavern. The Brewmaster, Wesley, Merris and the Moon Shinobi took the right side, while the other LaCroix and Fingers took the left.


Turn 1 saw both sides advance towards the centre of the board, with Francois taking some pot shots at the Daimyo and doing some moderate damage while the Samurai shot and missed Sammy, who had just walked forwards and dropped a sneaky Scheme Marker.

Fingers went Reckless and moved up to one of the Squat Markers, then used Open Bar to push the Samurai towards the Brewmaster, hoping to get it out of position. One of the Punk Zombies, made Fast by Toshiro's War Fan, punished Fingers for his cockiness. Fingers hit his Squeel trigger, and bounced from one Squat Marker to the other - and then back again after taking a hit from a charging Misaki! Unfortunately for Fingers, Misaki hit a trigger that let her push 4" also, following Fingers and hitting him again. Just as I was regretting not using more Soulstones to prevent damage, Misaki flipped a Red Joker for damage, finishing off the slippery Fingers and ruining my plans somewhat, as Fingers' Chatty and Dont Mind Me... would have guaranteed a good amount of victory points.

Finally, Merris went Reckless and moved up to the right hand Squat Marker, ready to secure it next turn.


Brewmaster started off Turn 2 with his (0) Drinking Contest, then used Hangover to give Misaki negative flips on all flips and duels. He then charged Misaki, hitting her once to give her two +2 Poison.

The Daimyo advanced, dropping a Scheme Marker then using it to give out Focus to those around him. Sammy then took the opportunity to Jynx Misaki so that she couldn't declare Triggers, trapping her by the Brewmaster, then advanced to be in melee. As a Companion chain activation, Francois went Reckless and used The Gremlin Menace to move into combat with the Punk Zombie and attack him, unfortunately only taking the Zombie down to one health, and taking a significant amount of damage in return. Francois became the second Gremlin Henchman to fall as the Samurai used his (2) Action to push into melee with him, finish him off, and push away again.

Merris also went Reckless, taking a Squat Marker and flying off to drop some Scheme Markers the next turn. The Torokage went for two Squat Markers, while the Moon Shinobi went for another, only to take a charge from the other, Unimpeded, Punk Zombie, only just surviving the first hit and drunkenly slinking away with his defensive trigger.

Misaki tried to do something, but ended up having a drink with Brewmaster instead - flipping negatives on her Wp tests to do anything else!

Finally, Wesley moved up, in case the Brewmaster needed him.


On what would become the last turn, the Brewmaster activated first for the Gremlins, using his (0) Drinking Contest again and giving Misaki some more Poison with a trigger to also give her Swill. He then Obeyed the Punk Zombie, moving him into combat with him, but close to Sammy's Scheme Marker for Plant Explosives.


The Samurai had a similar idea, dropping a Scheme Marker and moving into combat with Sammy. In an attempt to stop the Ten Thunders scoring VP, she used Putrefy on the enemy Scheme Marker with no high Crows in my hand - and flipped a thirteen of Crows, turning it into a Stuffed Piglet!


Merris went Reckless and dropped two Scheme Markers behind the tavern while the Torokage and Punk Zombie were busy killing the Moon Shinobi and taking one of the Squat Markers for the Ten Thunders.

Sadly for the Brewmaster, moving the Punk Zombie into combat with him had been a mistake, as it used (2) Flurry to take three Attack Actions, passing enough Wp tests to get the Brewmaster down to two wounds, with none reduced as I had been spending Soulstones like crazy throughout the game. Sensing weakness, Misaki discarded Recalled Training to power through the booze, hitting the Assassinate trigger and ending him as well as completing the Assassinate Scheme for 3 VP. Wesley automatically promoted himself to Brewmaster with There Must Always Be One, unwisely stepping into combat range of Misaki.. who then hit the Assassinate trigger on him also. Talk about déjà vu!


At the end of the Turn, the second Torokage stalked over and dropped a Scheme Marker, which then detonated alongside my own, both for Plant Explosive. At this point I called the game, unsurprisingly, as despite scoring 3 VP for Plant Explosives and a possible 2 VP for Breakthrough, the Gremlins had no chance of getting enough Strategy VPs to pull it back.

It was definitely fun to use Brewmaster again, with his ability to completely shut down enemy models. I underestimated Misaki, perhaps due to what Old Major did to her in our last game - she certainly lived up to her assassin reputation in this game!

Next time I should be using either Wong... or the underdog spoon-wielding Mah Tucket! We'll have to see what Schemes and Strategies are in store, and how fast I can get them both assembled.