Monday, 29 August 2016
Sunday, 28 August 2016
Reinforcements - Wong, Mah and more Hogs!
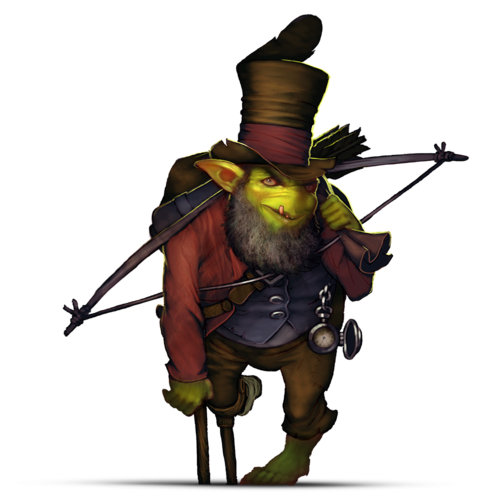
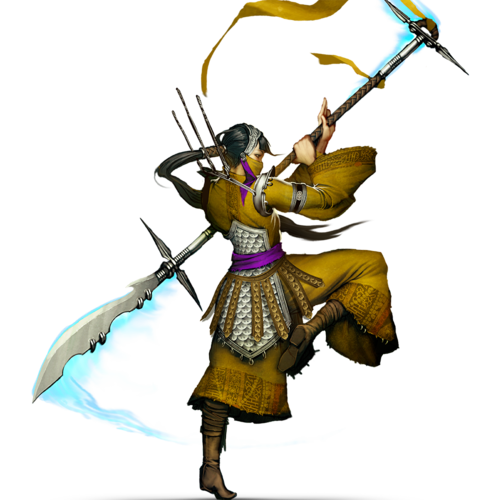
After a long day's work, and lots of swearing, I have a couple of new Masters to try out:
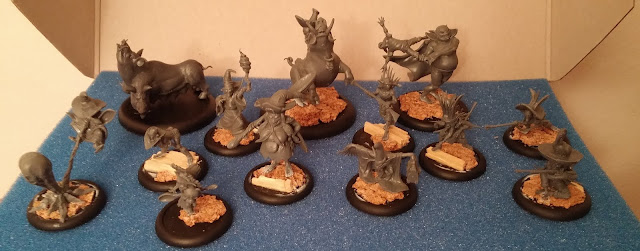
I wasn't going to pick up Mah originally, but Trixiebelle is a great Henchman and I want to try a melee-oriented Mah crew out - some Rooster Riders are on their way, too, which I'm sure will find a place in several lists!

I wasn't going to pick up Mah originally, but Trixiebelle is a great Henchman and I want to try a melee-oriented Mah crew out - some Rooster Riders are on their way, too, which I'm sure will find a place in several lists!
Friday, 26 August 2016
Brewmaster vs. Misaki
Had a quick rematch against Misaki today - this time as Brewmaster! I've played him a couple of times before, but not recently. I was going to try Wong, but I haven't got the rest of his Crew together yet, so I hastily threw an accidentally Henchman-heavy list together.
Deployment: Standard Deployment
Strategy: Squatter's Rights
Schemes: Assassinate, Cursed Object, Breakthrough and Plant Explosives
Gremlins:
Brewmaster with Binge, Running Tab and The Good Stuff
Apprentice Wesley
Fingers with Drinking Problem
Francois LaCroix with Team Work
Sammy LaCroix with Hold Their Hair Back and Stilts
Merris LaCroix
Moon Shinobi
Schemes: Breakthrough, Plant Explosives
Ten Thunders:
Misaki with Stalking Bisento and Recalled Training
Shang
Toshiro the Daimyo with Command the Graves
Samurai with Favour of Jigoku
Torokage
Torokage
Punk Zombie
Punk Zombie
Schemes: Assassinate, Plant Explosives
Deployment:

Misaki, Shang, a Torokage and the Samurai took the right side of the Ten Thunders deployment area, while the Daimyo and the rest deployed by the large tavern. The Brewmaster, Wesley, Merris and the Moon Shinobi took the right side, while the other LaCroix and Fingers took the left.
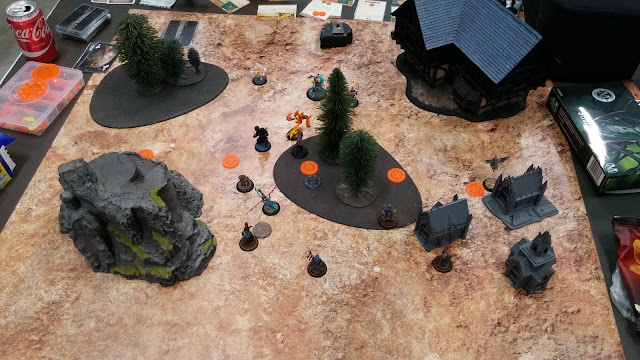
Turn 1 saw both sides advance towards the centre of the board, with Francois taking some pot shots at the Daimyo and doing some moderate damage while the Samurai shot and missed Sammy, who had just walked forwards and dropped a sneaky Scheme Marker.
Fingers went Reckless and moved up to one of the Squat Markers, then used Open Bar to push the Samurai towards the Brewmaster, hoping to get it out of position. One of the Punk Zombies, made Fast by Toshiro's War Fan, punished Fingers for his cockiness. Fingers hit his Squeel trigger, and bounced from one Squat Marker to the other - and then back again after taking a hit from a charging Misaki! Unfortunately for Fingers, Misaki hit a trigger that let her push 4" also, following Fingers and hitting him again. Just as I was regretting not using more Soulstones to prevent damage, Misaki flipped a Red Joker for damage, finishing off the slippery Fingers and ruining my plans somewhat, as Fingers' Chatty and Dont Mind Me... would have guaranteed a good amount of victory points.
Finally, Merris went Reckless and moved up to the right hand Squat Marker, ready to secure it next turn.
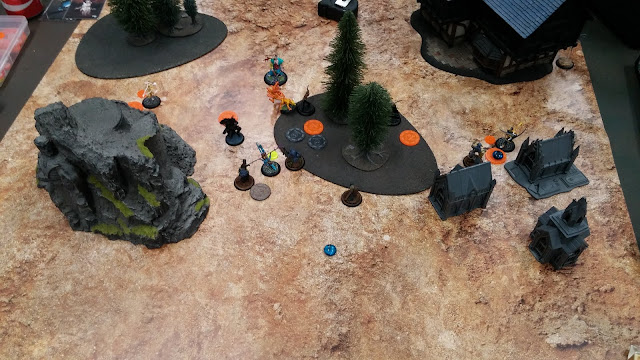
Brewmaster started off Turn 2 with his (0) Drinking Contest, then used Hangover to give Misaki negative flips on all flips and duels. He then charged Misaki, hitting her once to give her two +2 Poison.
The Daimyo advanced, dropping a Scheme Marker then using it to give out Focus to those around him. Sammy then took the opportunity to Jynx Misaki so that she couldn't declare Triggers, trapping her by the Brewmaster, then advanced to be in melee. As a Companion chain activation, Francois went Reckless and used The Gremlin Menace to move into combat with the Punk Zombie and attack him, unfortunately only taking the Zombie down to one health, and taking a significant amount of damage in return. Francois became the second Gremlin Henchman to fall as the Samurai used his (2) Action to push into melee with him, finish him off, and push away again.
Merris also went Reckless, taking a Squat Marker and flying off to drop some Scheme Markers the next turn. The Torokage went for two Squat Markers, while the Moon Shinobi went for another, only to take a charge from the other, Unimpeded, Punk Zombie, only just surviving the first hit and drunkenly slinking away with his defensive trigger.
Misaki tried to do something, but ended up having a drink with Brewmaster instead - flipping negatives on her Wp tests to do anything else!
Finally, Wesley moved up, in case the Brewmaster needed him.

On what would become the last turn, the Brewmaster activated first for the Gremlins, using his (0) Drinking Contest again and giving Misaki some more Poison with a trigger to also give her Swill. He then Obeyed the Punk Zombie, moving him into combat with him, but close to Sammy's Scheme Marker for Plant Explosives.

The Samurai had a similar idea, dropping a Scheme Marker and moving into combat with Sammy. In an attempt to stop the Ten Thunders scoring VP, she used Putrefy on the enemy Scheme Marker with no high Crows in my hand - and flipped a thirteen of Crows, turning it into a Stuffed Piglet!
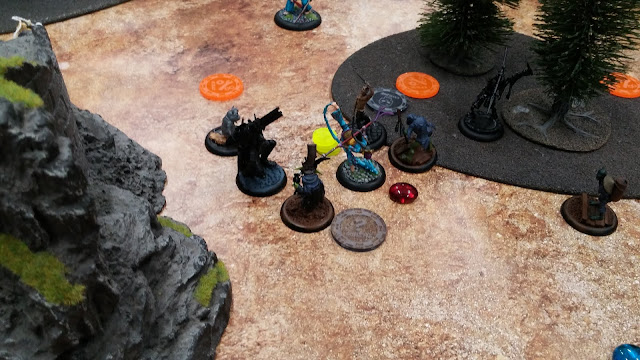
Merris went Reckless and dropped two Scheme Markers behind the tavern while the Torokage and Punk Zombie were busy killing the Moon Shinobi and taking one of the Squat Markers for the Ten Thunders.
Sadly for the Brewmaster, moving the Punk Zombie into combat with him had been a mistake, as it used (2) Flurry to take three Attack Actions, passing enough Wp tests to get the Brewmaster down to two wounds, with none reduced as I had been spending Soulstones like crazy throughout the game. Sensing weakness, Misaki discarded Recalled Training to power through the booze, hitting the Assassinate trigger and ending him as well as completing the Assassinate Scheme for 3 VP. Wesley automatically promoted himself to Brewmaster with There Must Always Be One, unwisely stepping into combat range of Misaki.. who then hit the Assassinate trigger on him also. Talk about déjà vu!
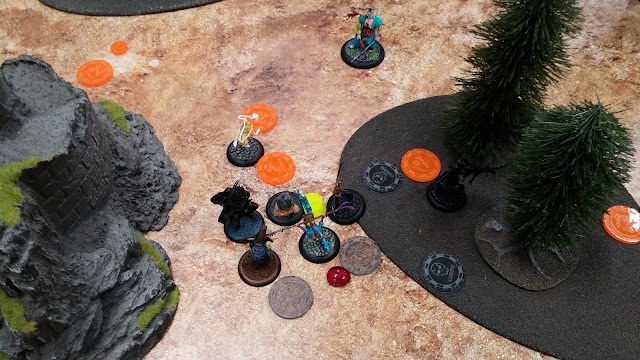
At the end of the Turn, the second Torokage stalked over and dropped a Scheme Marker, which then detonated alongside my own, both for Plant Explosive. At this point I called the game, unsurprisingly, as despite scoring 3 VP for Plant Explosives and a possible 2 VP for Breakthrough, the Gremlins had no chance of getting enough Strategy VPs to pull it back.
It was definitely fun to use Brewmaster again, with his ability to completely shut down enemy models. I underestimated Misaki, perhaps due to what Old Major did to her in our last game - she certainly lived up to her assassin reputation in this game!
Next time I should be using either Wong... or the underdog spoon-wielding Mah Tucket! We'll have to see what Schemes and Strategies are in store, and how fast I can get them both assembled.
Deployment: Standard Deployment
Strategy: Squatter's Rights
Schemes: Assassinate, Cursed Object, Breakthrough and Plant Explosives
Gremlins:
Brewmaster with Binge, Running Tab and The Good Stuff
Apprentice Wesley
Fingers with Drinking Problem
Francois LaCroix with Team Work
Sammy LaCroix with Hold Their Hair Back and Stilts
Merris LaCroix
Moon Shinobi
Schemes: Breakthrough, Plant Explosives
Ten Thunders:
Misaki with Stalking Bisento and Recalled Training
Shang
Toshiro the Daimyo with Command the Graves
Samurai with Favour of Jigoku
Torokage
Torokage
Punk Zombie
Punk Zombie
Schemes: Assassinate, Plant Explosives
Deployment:

Misaki, Shang, a Torokage and the Samurai took the right side of the Ten Thunders deployment area, while the Daimyo and the rest deployed by the large tavern. The Brewmaster, Wesley, Merris and the Moon Shinobi took the right side, while the other LaCroix and Fingers took the left.

Turn 1 saw both sides advance towards the centre of the board, with Francois taking some pot shots at the Daimyo and doing some moderate damage while the Samurai shot and missed Sammy, who had just walked forwards and dropped a sneaky Scheme Marker.
Fingers went Reckless and moved up to one of the Squat Markers, then used Open Bar to push the Samurai towards the Brewmaster, hoping to get it out of position. One of the Punk Zombies, made Fast by Toshiro's War Fan, punished Fingers for his cockiness. Fingers hit his Squeel trigger, and bounced from one Squat Marker to the other - and then back again after taking a hit from a charging Misaki! Unfortunately for Fingers, Misaki hit a trigger that let her push 4" also, following Fingers and hitting him again. Just as I was regretting not using more Soulstones to prevent damage, Misaki flipped a Red Joker for damage, finishing off the slippery Fingers and ruining my plans somewhat, as Fingers' Chatty and Dont Mind Me... would have guaranteed a good amount of victory points.
Finally, Merris went Reckless and moved up to the right hand Squat Marker, ready to secure it next turn.

Brewmaster started off Turn 2 with his (0) Drinking Contest, then used Hangover to give Misaki negative flips on all flips and duels. He then charged Misaki, hitting her once to give her two +2 Poison.
The Daimyo advanced, dropping a Scheme Marker then using it to give out Focus to those around him. Sammy then took the opportunity to Jynx Misaki so that she couldn't declare Triggers, trapping her by the Brewmaster, then advanced to be in melee. As a Companion chain activation, Francois went Reckless and used The Gremlin Menace to move into combat with the Punk Zombie and attack him, unfortunately only taking the Zombie down to one health, and taking a significant amount of damage in return. Francois became the second Gremlin Henchman to fall as the Samurai used his (2) Action to push into melee with him, finish him off, and push away again.
Merris also went Reckless, taking a Squat Marker and flying off to drop some Scheme Markers the next turn. The Torokage went for two Squat Markers, while the Moon Shinobi went for another, only to take a charge from the other, Unimpeded, Punk Zombie, only just surviving the first hit and drunkenly slinking away with his defensive trigger.
Misaki tried to do something, but ended up having a drink with Brewmaster instead - flipping negatives on her Wp tests to do anything else!
Finally, Wesley moved up, in case the Brewmaster needed him.

On what would become the last turn, the Brewmaster activated first for the Gremlins, using his (0) Drinking Contest again and giving Misaki some more Poison with a trigger to also give her Swill. He then Obeyed the Punk Zombie, moving him into combat with him, but close to Sammy's Scheme Marker for Plant Explosives.

The Samurai had a similar idea, dropping a Scheme Marker and moving into combat with Sammy. In an attempt to stop the Ten Thunders scoring VP, she used Putrefy on the enemy Scheme Marker with no high Crows in my hand - and flipped a thirteen of Crows, turning it into a Stuffed Piglet!

Merris went Reckless and dropped two Scheme Markers behind the tavern while the Torokage and Punk Zombie were busy killing the Moon Shinobi and taking one of the Squat Markers for the Ten Thunders.
Sadly for the Brewmaster, moving the Punk Zombie into combat with him had been a mistake, as it used (2) Flurry to take three Attack Actions, passing enough Wp tests to get the Brewmaster down to two wounds, with none reduced as I had been spending Soulstones like crazy throughout the game. Sensing weakness, Misaki discarded Recalled Training to power through the booze, hitting the Assassinate trigger and ending him as well as completing the Assassinate Scheme for 3 VP. Wesley automatically promoted himself to Brewmaster with There Must Always Be One, unwisely stepping into combat range of Misaki.. who then hit the Assassinate trigger on him also. Talk about déjà vu!

At the end of the Turn, the second Torokage stalked over and dropped a Scheme Marker, which then detonated alongside my own, both for Plant Explosive. At this point I called the game, unsurprisingly, as despite scoring 3 VP for Plant Explosives and a possible 2 VP for Breakthrough, the Gremlins had no chance of getting enough Strategy VPs to pull it back.
It was definitely fun to use Brewmaster again, with his ability to completely shut down enemy models. I underestimated Misaki, perhaps due to what Old Major did to her in our last game - she certainly lived up to her assassin reputation in this game!
Next time I should be using either Wong... or the underdog spoon-wielding Mah Tucket! We'll have to see what Schemes and Strategies are in store, and how fast I can get them both assembled.
Wednesday, 24 August 2016
Trouble Brewing Tactica - Ulix
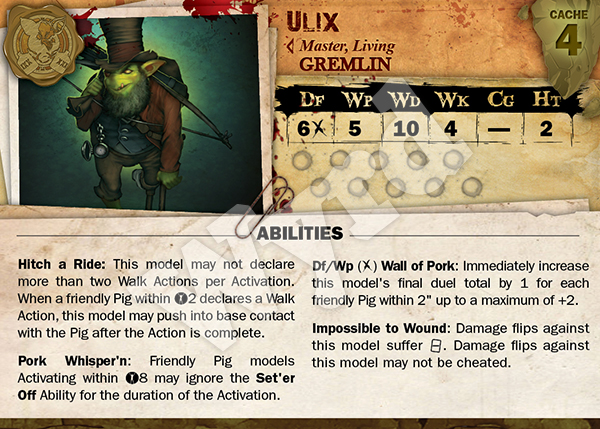
Having played a few games, and with Wyrd having made images of all of the Master stat cards available, as well as excess spare time, I've decided to write up some Tacticas for the many Masters available to the Gremlin Faction. First up: Ulix, the Hogmaster!
Master: Ulix
Focus: Pigs, Summoning, StampedesTotems: Penelope, Old Cranky
Restricted Upgrades: Husbandry, Hunting Bow
Front of Card:
Abilities:
Hitch a Ride:
Pork Whisper'n:
This Ability is pretty mandatory for Ulix, as it allows some control of his Crew. It's easy to forget to check the 8" bubble, though, so be warned! It's also easy to bunch up too much, but with Penelope or a Hog Whisperer you can spread out a bit, and Pork Whisper'n is now available to other models as a cheap upgrade. With Old Major, your Pigs won't charge other Pigs, which means you can be more lax with your Whisper'n - although be careful not to let your Pigs be pulled away from crucial objectives!
Wall of Pork and Impossible to Wound:
Ulix's Df 6 is pretty good to start with, and this Defensive Trigger can take it all the way up to 8! As you'll always be near some Pigs anyway, this Trigger can be a lifesaver for Ulix, who is often on low health after summoning War Pigs and using (0) Proper Care, but be wary of Conditions that strip you of your built-in suits. Impossible to Wound adds to this survivability, preventing your opponent from cheating in a Severe or a Red Joker to take Ulix out and burst your Whisper'n bubble.
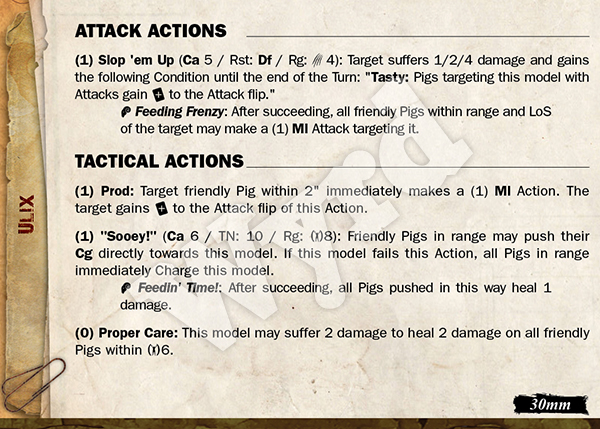
Back of Card:
Attack Actions:(1) Slop 'em Up:Ulix's only base Attack Action is a strange one, but it can be very useful. It's a moderate Ca 5, with low Weak and Moderate damage and a decent Severe. This isn't anything to write home about, but with his Rg 4, Ulix can trap models in melee with him - quite safely, too, if you have Pigs with him and hence are sitting at Df 7 or 8.This Attack's only trigger is Freeding Frenzy, which is great if you somehow have a model surrounded by Pigs, but you're usually better off using (1) Prod to make them attack with a positive flip.Tactical Actions:(1) Prod:With Prod, you can force your nearby Pigs to take Ml actions out-of-activation, and they get a positive twist to the attack flip to boot. Amazing with Wild Boars, who get positive flips when they attack out of activation, but also great with Old Major, with his horrifying damage track and minimum damage of 3.(1) "Sooey!":Use Sooey to reposition your Pigs if you need to, but make sure you can cheat in a 4 or higher if you need to. You really, really don't want to get charged by all your nearby pigs! This Action is useful against Crews who like to reposition your Pigs with Lure and the like, as well as for pulling Pigs back into your Whisper'n bubble.(0) Proper Care:With Proper Care, you can heal ALL friendly pigs within a pulse for 2. You'll be using this a lot. With one use, you can heal three summoned Piglets from Ulix's 3 AP to full health, as well as some damage on the Pig you summoned them from.Upgrades:Husbandry:This is Ulix's summoning upgrade, and you'll almost always want it. It's quite costly for an Upgrade, but as the soulstone cost is less than a single Piglet it more than makes up for it. Ulix gains two (1) Actions from this upgrade, one that lets him summon Piglets, and another that lets him summon a War Pig. Summoning Piglets is straightforward - a 9 or higher of any suit will get you one damaged Piglet, but you have to damage a 50mm-based Pig as well. Summoning a War Pig requires a 12 or higher, as well as three friendly Scheme Markers and a fair bit more damage, this time to Ulix himself as well as the summoned War Pig. Thankfully, Ulix can heal up the Pigs, and a Slop Hauler can heal up Ulix. Be careful not to get assassinated while on low health after a round or two of heavy summoning - consider taking Dirty Cheater to heal up some of the wounds he takes, especially as you'll often be cheating in cards to summon Pigs.Setting up a triangle of Scheme Markers to summon a War Pig might seem difficult, but it's easily doable on Turn 2. On Turn 1 you can summon up to three Piglets (use a Soulstone to draw and discard two cards if you don't get enough high cards in your draw. Remember to hold onto a 12 or higher to cheat the Ca flip to summon a War Pig!), which can drop Scheme Markers as a (0) Interact Action the turn after they are summoned if they have LoS to a model with Corn Husks, ideally on the Ht 3 Old Major. Alternatively, you can take Merris LaCroix, who can make a summoning triangle all on her own with Reckless and her (0) "Bombs Away!". Remember that your Slop Hauler can Reckless and drop a Scheme Marker before using his (2) Action to heal, useful in the late game when you want to get a summoning triangle together in a hurry.Sammy LaCroix can carry this Upgrade for Ulix, but this will limit you to two summons per turn. It's something to consider, but Sammy might be best with Ulix's other Upgrade, Hunting Bow.Hunting Bow:This Upgrade gives Ulix a pretty good (1) Sh Attack Action, with a great Sh value, decent range and damage track. This means that Ulix has something to do when more than 4" away from an enemy and with no Pigs to summon, Sooey or Prod. It also has a trigger, Blood Trail, that causes Pigs to deal +1 damage to the target - good with any Pig, but great for Piglets and their low damage track, turning them into a threat.As well as an attack action, this Upgrade gives Ulix (1) Shot in the Rear, which is a Ca Action that causes a friendly Pig to go on a rampage, charging a legal target - of your choice, unlike Pigcharge - and continuing to Charge new targets if the Pig kills them. As a (1) Action, you can use this on a freshly summoned War Pig, to terrifying effect.Sammy LaCroix can also carry this Upgrade, allowing her to take shots at the enemy and make Ulix's Pigs go on rampant killing sprees. As mentioned, taking the summoning upgrade on Sammy means less summons per turn, so Hunting Bow is usually the better choice for Sammy.Summary, Strategies and Schemes:While Som'er like Pigs, and Wong is great with a Glowy Gracie, Ulix is the premier Gremlin master for running an army of Pigs. He can summon, heal, push, control, enrage and support his Pigs while being a hard-to-remove nuisance for the enemy to deal with, and has access to a good ranged Attack. When taking Husbandry, you want to start with a strong hand for summoning, so be sure to spend a Soulstone on the first draw if you don't get many high cards. Three 9s or higher and a 12 means you can add 21 Soulstones worth of Pigs by the end of Turn 2!Ulix and his Crew work well for most Strategies and Schemes, with Piglets usually able to do (1) Interact Actions as a (0) thanks to Corn Husks. This is excellent for Squatters Rights, Distract and Cursed Object. Piglets can even move, Pigcharge as a (1) Action, and then hand out a Cursed Object or Distract an enemy as a (0); however, Piglets need to watch out for unwanted mandatory charges. Corn Husks also lets your Pigs eat up enemy Scheme Markers, and even heal from it - fantastic against Schemes like Plant Explosives and A Line in the Sand, as well as being a nightmare for crews that rely on Scheme Markers, like Colette and the upcoming Fey Queen, Titania. As you are likely to out-activate your opponent, Ulix and his Pigs can also be good at Reconnoitre, Outflank and the like, securing table quarters or edges late in the turn. Reckoning is the one tricky Strategy for Ulix, as his summoned Piglets are easy to dispatch, although his Pigs can be pretty good at scoring VP in return.Take Ulix if you like synergy, herding Pigs, frustrating your opponent and dominating Strategies and Schemes. Despite being a complex Master to master, he's fairly newbie-friendly. Be aware, however, that his reliance on Pigs can make him almost a sub-faction of his own.Starter Box:
Hog Wild comes with Ulix, his totem Penelope, Old Major and three Wild Boars. On its own as a force, the box can be fun and effective - Ulix can tag along with the Wild Boars, making the most of his Prod Action, while messing with enemy Scheme Markers thanks to Corn Husks on Old Major. Taking the Hunting Bow on Ulix is pretty mandatory with three Wild Boars, as they get positive flips to attack flips made out of activation. Penelope is a fitting Totem for Ulix, handing out a buff to Wk to nearby Pigs, and pushing them about as a (0) action. As the Wild Boars and Penelope have From the Shadows, almost all of the Starter Box can begin right up in your opponent's face!
While Old Major and Penelope are great outside of the box, the Wild Boars struggle to compete with similarly priced models available to hire. That said, don't disregard them entirely when expanding your force - they can be great for some Strategies and Schemes, and have a lot of synergy with Ulix. If you are thinking of getting Zoraida or McTavish down the line, they also are excellent Obey and Wrangle Critter targets.
To build up to a 50ss crew with Ulix, the first boxes you should pick up are some Piglets and a War Pig. You might even want a second box of each down the line, but it isn't necessary to start with. Beyond that, another 50mm-based Pig is a good choice - either The Sow or Gracie. With The Sow, you'll want another box of Piglets thanks to Farrowing, and with Gracie you'll want Burt Jenkins as they are excellent together. Merris LaCroix is another excellent addition, as she can help set up War Pig summoning triangles and is unparalleled at Scheme running. Finally, if you want to pick up a second Master after Ulix, Som'er's box is a good choice, as he can run well with Pigs and nets you Lenny, and Wong's box works great with Gracie and Burt if you picked them up to get to 50ss.
Pictures and cards are from Wyrd Miniatures - www.wyrd-games.net/ulix/
Sunday, 21 August 2016
Ulix vs. Misaki
Deployment: Standard Deployment
Strategy: Reconnoitre
Schemes: Cursed Object, Outflank
Strategy: Reconnoitre
Schemes: Cursed Object, Outflank
Gremlins:
Ulix with Husbandry, Dirty Cheater and Hunting Bow
Penelope
Old Major with Corn Husks
Gracie with Saddle
Burt Jenkins with Dirty Cheater
Wild Boar
Slop Hauler
Old Major with Corn Husks
Gracie with Saddle
Burt Jenkins with Dirty Cheater
Wild Boar
Slop Hauler
Ten Thunders:
Misaki with Stalking Bisento and Smoke and Shadows
Izumi the Armour with Blot the Sky
Ten Thunders Brother
Ten Thunders Brother
Ten Thunders Brother
Ten Thunders Brother
Thunder Archer
Thunder Archer
Torokage
Torokage
Torokage
Torokage
Deployment:
 |
| (Scenery mainly from TT Combat and gaming mat from Deep Cut Studios) |
Aiming to secure one of the flanks for Outflank, the Wild Boar used From The Shadows to deploy up the board on the right, while Penelope scouted ahead while the rest deployed in the centre. Izamu, Misaki and the Thunder Archers deployed opposite, while the Torokage and Ten Thunders Brothers formed pairs on the flanks.
Ulix began by attempting to summon three Piglets, but only managed two. These Piglets activated and dropped Scheme Markers [edit: it's been pointed out to me that they can't do this the turn that they are Summoned. Oops! I thought they just gained Slow.], then the Slop Hauler finished off the War Pig Scheme Marker triangle.
The Torokage disappeared in smoke while the Ten Thunders Brothers advanced, one going for a flank while the other took cover behind a mine cart.
Gracie advanced and Riled Up to gain Reactivate, bringing along Burt, who took some pot shots at the Ten Thunders Brother behind the mine cart.
Izamu and the Thunder Archers moved up, and Misaki triple walked and chose Gracie as her Stalk target. Gracie, spooked, charged and ate the Ten Thunders Brother but ending up with Misaki in her face due to Stalk. Penelope pulled Gracie back to be next to Burt again.
The Wild Boar dropped a scheme marker, but did nothing else, as Outflank scores at the end of the game.
At the end of the Turn, the Thunder Archers took their Blot the Skies shots granted by Izamu, damaging Old Major and the Piglets with the Blasts, then the Torokage reappeared right in the midst of the Pigs!
At the start of Turn 2, Misaki changed her Stalk target to Old Major and charged in, ignoring all intervening models. Unfortunately for her, his twelve wounds proved too many, surviving the onslaught - just!
Penelope, in combat with a Torokage, pulled Gracie out of combat so that she could charge back in, then tried to take on the Torokage, but failed. The Torokage responded by repositioning behind her and turning her into a Corpse Marker.
Old Major activated, tusking Misaki for 'weak' damage of three and discarded a low Masks to push a Piglet into combat with the Torokage, giving it the Masks trigger - Bowl Over - on all of its attacks.
The surviving Ten Thunders Brother moved up and dropped a Scheme Marker for A Line in the Sand, then the Piglet attacked the Torokage, pushing it back far enough for the Wild Boar to Bayou Rampage and finish it off while the other Torokage tried to kill Burt and almost succeeded.
Sensing Burt was in danger, Gracie charged the last Torokage and, with her insane +2 Damage Rams trigger, finished it off and ate her fill.
Izamu and the Archers advanced, taking shots at Old Major with Thread the Needle, but Soulstones kept him alive.
Ulix summoned a War Pig with a cheated twelve and a further Piglet from the same War Pig, then healed Old Major, the War Pig and the Piglet for two with Proper Care and walked closer to Old Major. The Slop Hauler activated and helped heal Old Major, Ulix and the War Pig.
Burt activated next, attacking Misaki with his Lucky Knife, doing some damage, then a Piglet tried to nip at Misaki then handed her a Cursed Object, while the War Pig and the newest Piglet went for the flank, avoiding the mess of the centre of the board.
At the end of the Turn, the Thunder Archers bombarded the pigs, then both players scored for Reconnoitre and the Cursed Object scored for the Gremlins.
Izamu started the next turn by almost taking out Gracie, who was too far away to strike back. Old Major went after Misaki, doing some more damage and healing up with her Crows trigger. Misaki tried to finish off Burt, but he made her attack a Piglet instead, so she focused the rest of her efforts on killing Gracie, succeeding.
Trying to lower Misaki's defences, the Reckless Slop Hauler fired (er, hauled) into combat, hitting Burt by mistake and making him extra tasty, then healed Old Major, himself and Ulix. One of the Piglets tried to tie up one of the Archers, but ended up Stampeding into Izamu (oops.) The Thunder Archers tried to end Old Major and Burt, then Burt, now unable to Reckless due to only having one HP, took a couple of swings at Misaki, healing up by cheating low and missing.
The Ten Thunders Brother repositioned and dropped a second Scheme Marker for Line in the Sand, and with no activations left, left the Gremlins to finish up.
Ulix prodded Old Major twice, forcing her to attack - and brutally finish off - Misaki, healing Old Major even further with Crow triggers to boot!
The flanking Piglet and War Pig moved up further, while the Wild Boar used his (0) action to push back to the Scheme Marker he dropped previously, and then ran up into one of the Ten Thunders-held table quarters for Reconnoitre.
At the end of the Turn, the Thunder Archers hailed fire on the Pigs again, doing some good damage with their Blasts. Both sides scored for Reconnoitre, but only one point for the Ten Thunders thanks to the Wild Boar.
Leaderless, the Ten Thunders bravely fought on, but only briefly. The War Pig charged in, Stampeding from the closest Thunder Archer into Izamu. Ulix then managed to cause it to charge the weaker Thunder Archer with his Hunting Bow. After killing the Archer, the War Pig stampeded and killed the other Archer and charged the last Ten Thunders Brother, at which point we called the game.
Old Major was definitely MVP for this match, despite needing some encouragement from Ulix.
Ulix has been very impressive against the Ten Thunders masters, beating both Misaki and Shenlong, but losing to Mei Feng. I look forward to facing their next master - I know one of the Ten Thunders players has picked up Jacob Lynch, who should be very different.
I've been playing Ulix and the Hogs non-stop since I started writing up Battle Reports, but I do play other Gremlin masters, honest! While Zoraida is taking some time out until I can get my hands on some Will O' Wisps, which I'm really excited for, Ophelia, Som'er and Brewmaster need to see the table again, as well as Wong, who I've just picked up! Time to watch Big Trouble in Little China, I think...
Thursday, 18 August 2016
Shifting Loyalties Campaign - Week 2
Week 2 of our Shifting Loyalties campaign saw Old Major and the Hogs face off against The Daimyo again, as we have two Ten Thunders players using him as their Leader.
The Hogs added The Sow to their Arsenal for 3 Scrip as she was their first and only hire of the week.
Deployment: Flank Deployment
Strategy: Stake a Claim
Schemes: Protect Territory, Frame for Murder (Wild Boar)
Weekly Event: Vermin Infestation
Gremlins:
- Old Major with Corn Husks and Expanded Palette
- Gracie
- The Sow (proxied by a metal War Pig)
- Wild Boar
- Piglet
- Piglet
Ten Thunders:
- Toshiro the Daimyo with Command the Graves
- High River Monk
- High River Monk
- Lost Katanaka Sniper (appears on Turn 3)
- Komainu
- Injured Komainu (must discard a card upon activating or receive Slow)
Deployment:
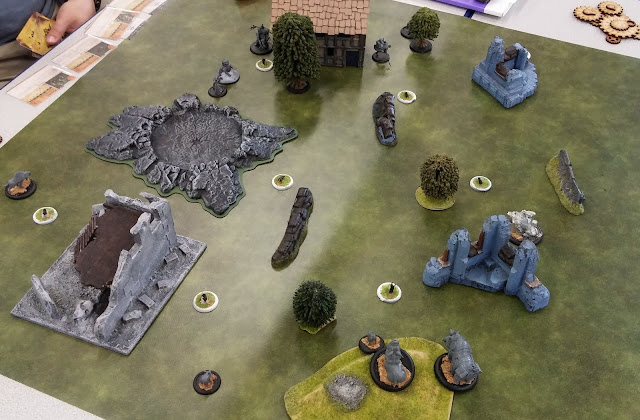
The Piglets advanced, chasing Vermin markers around the table for Scrip (the Ten Thunders kept cheating in high cards to make the counters scurry away) until the Slow Komainu charged in and distracted them for a few turns. The Wild Boar tried to Interact with one of the Vermin Markers before going after the Daimyo, but flipped a Red Joker, taking 3 damage and ending his Activation!
The Sow advanced and squished a Vermin for 2 Scrip, while Old Major and Gracie moved up to the centre.
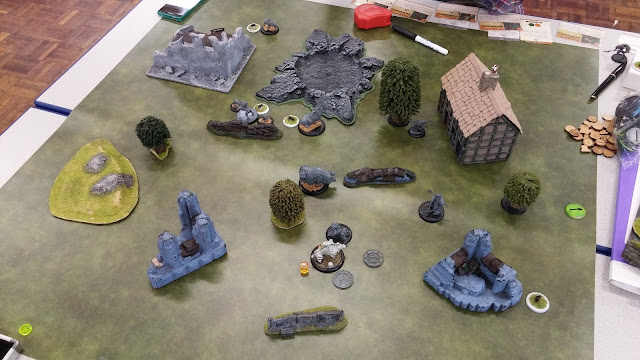
The Daimyo and one of the Monks squished a Vermin and repositioned to the other side of the board. The Sow took a charge from a Komainu and one of the Monks, taking some Burning counters and losing some health, but not enough to lose the positive flips to attack and damage from Three Headed, meaning she tore the Monk apart in return, with healing flip triggers as a bonus.
Old Major, with nothing much to do, tried to squish a Vermin while the Piglets brawled with the Komainu, but to no avail. The Wild Boar, too far to Charge anything, continued chasing after his Vermin Marker. The Daimyo summoned an Ashigaru, but with no cards left, the Ashigaru couldn't discard a card to charge, and Old Major gained Reactivate.
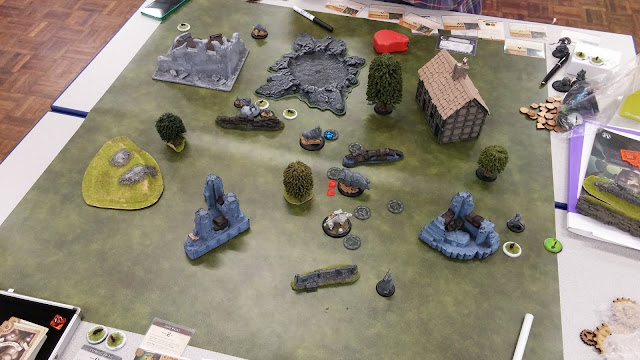
Gracie charged into the fray, targeting the Daimyo and flipping a Red Joker for damage on her second attack, killing him. Gracie Riled Up to gain Reactivate, finishing off the second Komainu and Eating her Fill to go back to full health.
The Sow charged the summoned Ashigaru, killing it, and Old Major took a (2) Interact Action to Stake his Claim.
Despite only having the Komainu and the recently arrived Katanaka Sniper left, the Ten Thunders fought on. The Komainu was eaten by Piglets while the Sniper took chunks of health from The Sow. With nothing left to do, the Hogs went about squishing Vermin and Protecting their Territory for Scrip. The Wild Boar caught his Vermin, almost dying in the process (which would have been great for Framed for Murder!) but sadly the Ten Thunders saved the Red Joker in their hand to kill one of the Piglets, who cheated death with an Ace to avoid injury after the game.
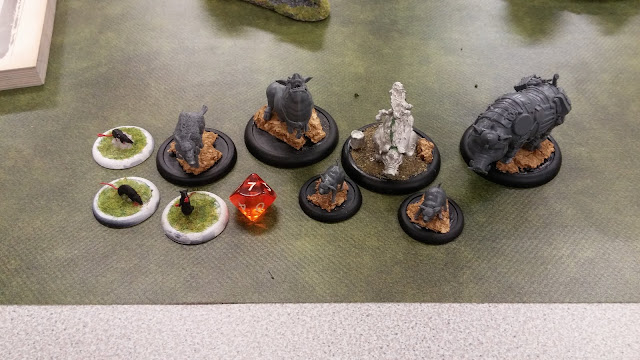
After a brutal game, not helped by extremely good flips for the Hogs and the opposite for the Ten Thunders, the Hogs ended with 7 VP, three Vermin Markers and one of two of the Scrip-scoring games needed for their Bounty, Strange Times. Gracie gained Tough Hide, for a horrific Regenerate +1, and Old Major bought a Grotesque Trophy, gaining Terrifying (All)!
Spare a thought for whoever has to face the Hogs next...!
The Hogs added The Sow to their Arsenal for 3 Scrip as she was their first and only hire of the week.
Deployment: Flank Deployment
Strategy: Stake a Claim
Schemes: Protect Territory, Frame for Murder (Wild Boar)
Weekly Event: Vermin Infestation
Gremlins:
- Old Major with Corn Husks and Expanded Palette
- Gracie
- The Sow (proxied by a metal War Pig)
- Wild Boar
- Piglet
- Piglet
Ten Thunders:
- Toshiro the Daimyo with Command the Graves
- High River Monk
- High River Monk
- Lost Katanaka Sniper (appears on Turn 3)
- Komainu
- Injured Komainu (must discard a card upon activating or receive Slow)
Deployment:

The Piglets advanced, chasing Vermin markers around the table for Scrip (the Ten Thunders kept cheating in high cards to make the counters scurry away) until the Slow Komainu charged in and distracted them for a few turns. The Wild Boar tried to Interact with one of the Vermin Markers before going after the Daimyo, but flipped a Red Joker, taking 3 damage and ending his Activation!
The Sow advanced and squished a Vermin for 2 Scrip, while Old Major and Gracie moved up to the centre.

The Daimyo and one of the Monks squished a Vermin and repositioned to the other side of the board. The Sow took a charge from a Komainu and one of the Monks, taking some Burning counters and losing some health, but not enough to lose the positive flips to attack and damage from Three Headed, meaning she tore the Monk apart in return, with healing flip triggers as a bonus.
Old Major, with nothing much to do, tried to squish a Vermin while the Piglets brawled with the Komainu, but to no avail. The Wild Boar, too far to Charge anything, continued chasing after his Vermin Marker. The Daimyo summoned an Ashigaru, but with no cards left, the Ashigaru couldn't discard a card to charge, and Old Major gained Reactivate.

Gracie charged into the fray, targeting the Daimyo and flipping a Red Joker for damage on her second attack, killing him. Gracie Riled Up to gain Reactivate, finishing off the second Komainu and Eating her Fill to go back to full health.
The Sow charged the summoned Ashigaru, killing it, and Old Major took a (2) Interact Action to Stake his Claim.
Despite only having the Komainu and the recently arrived Katanaka Sniper left, the Ten Thunders fought on. The Komainu was eaten by Piglets while the Sniper took chunks of health from The Sow. With nothing left to do, the Hogs went about squishing Vermin and Protecting their Territory for Scrip. The Wild Boar caught his Vermin, almost dying in the process (which would have been great for Framed for Murder!) but sadly the Ten Thunders saved the Red Joker in their hand to kill one of the Piglets, who cheated death with an Ace to avoid injury after the game.

After a brutal game, not helped by extremely good flips for the Hogs and the opposite for the Ten Thunders, the Hogs ended with 7 VP, three Vermin Markers and one of two of the Scrip-scoring games needed for their Bounty, Strange Times. Gracie gained Tough Hide, for a horrific Regenerate +1, and Old Major bought a Grotesque Trophy, gaining Terrifying (All)!
Spare a thought for whoever has to face the Hogs next...!
Tuesday, 16 August 2016
Ulix vs. Mei Feng
Strategy: Hostage Situation (Story Encounter)
Schemes: Distract, Cursed Object
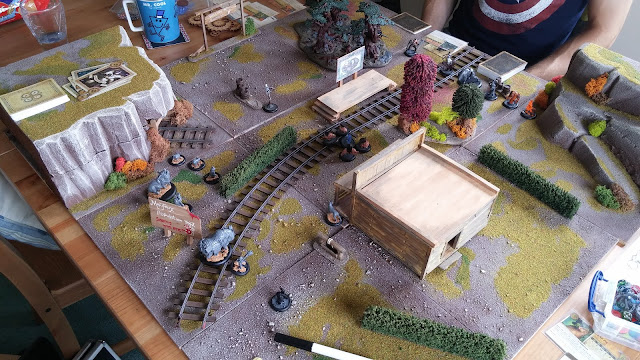
Board & Deployment:
Crews:
Gremlins:
- Ulix with Husbandry, Hunting Bow and Dirty Cheater
- Penelope
- Old Major with Corn Husks
- Gracie with Saddle
- Burt Jenkins with Dirty Cheater
- Slop Hauler
- Gremlin Taxidermist
- Four Stuffed Piglets (from the Encounter)
Arcanists:
- Mei Feng with Imbued Energies, Seismic Claw and Arcane Reservoir
- Emberling
- Joss with Imbued Energies
- Ice Gamin (Hostage)
- Fire Gamin
- Large Arachnid
- Sparks (available with his metal friend thanks to the 'Foundry' keyword)
- Mechanised Porkchop
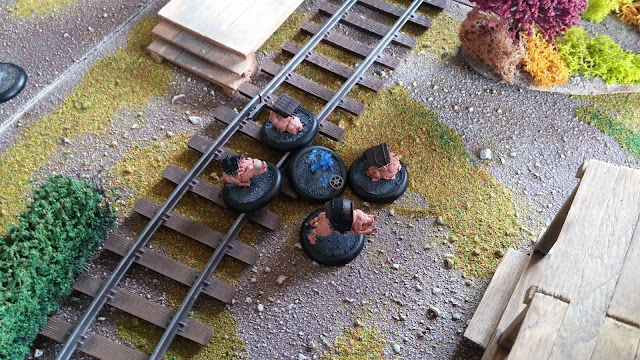
The game began with the Ice Gamin taken hostage and strapped to four Stuffed Piglets. The Arcanists would gain a VP for every turn after the first that the Gamin survived, while my Gremlins would get a VP for every turn after the first that the Gamin was still in base contact with a Stuffed Piglet.
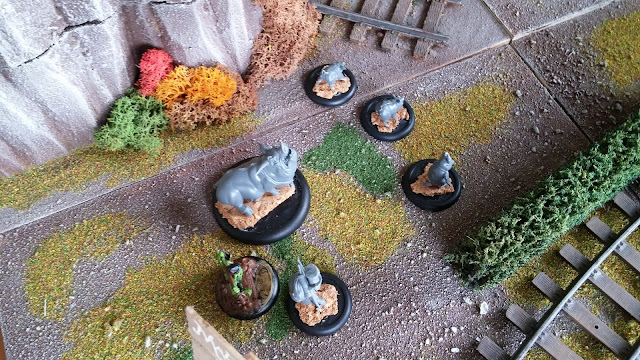
Ulix began by summoning three Piglets, despite a terrible starting hand. As before, these Piglets got to work setting up a triangle of Scheme Markers for Ulix to summon a War Pig later.
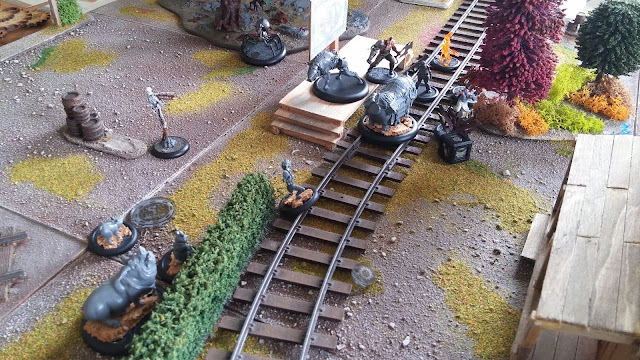
Gracie and Burt chugged forwards along the tracks, aiming to secure the centre, with the help of the Taxidermist's 'Never Happen' action giving Flight to Gracie, and Penelope's aura giving her an extra +1 Wk. The Taxidermist also sent one of the Stuffed Piglets forwards, exploding for 4 damage in a 1" pulse, taking a chunk of life from Sparks and the Mechanical Porkchop.
Meanwhile, the Arcanists were advancing quickly, with Sparks handing out Fast to Joss and an Accomplice activation. Mei Feng discarded Imbued Energies for Fast and teleported her way up the board with Railwalker, using the Tomes trigger to use it again and then spending her last two AP to pay Burt the Ransom, denying the Gremlins any VP from the Strategy as the Stuffed Piglets immediately disappeared!
The Ice Gamin ran away to safety, scoring 4 VP for the Arcanists over the course of the game.
Burt tried to make up for this with his Lucky Dagger but Mei Feng's defensive trigger pulled her out of his melee range. Frustrated, Burt spent his last two AP shooting at the rest of the Arcanists. Old Major walked up to the bush, giving Gracie a positive flip to charge attacks (and damage, which I forgot!) and pushing her nowhere but discarding a Rams to turn Gracie into a killing machine (+2 Damage trigger on Tusks). Gracie charged in, but didn't manage to score a kill, despite everything!
Penelope pulled Gracie back for a second charge next turn, but the Arcanists won the initiative flip and Joss, ignoring armour and Hard to Kill, decimated the poor bekettled War Pig. The Piglets got to work Distracting the Arcanists and giving the Fire Gamin a Cursed Object.
The Arcanists had been dropping Scheme Markers, one of which a Piglet ate, but another, dropped by the Large Arachnid, turned out to be for Plant Explosives - scoring 2 VP. Old Major ate the Large Arachnid as punishment.
Ulix's new War Pig charged in, causing a lot of problems for the Arcanists - especially when it healed itself to full from next to no wounds. Sparks and Joss finished it off, only for the Slop Hauler, Old Major and Ulix himself to drop enough Scheme Markers for another, and for Ulix to use his Hunting Bow to send it right back into the fray! War Pig #2 went on a stampede, taking Sparks and the Emberling before coming to a stop at Mei Feng and Joss, the smell of burning bacon in the air.
Mei Feng then disappeared into my Deployment Zone, untouchable by the many Pigs on the board, despite their many movement shenanigans and an extra turn. Too late I realised that this was for Entourage, netting the Arcanists the last VPs they needed for a win!
This was a great game, and a great Story Encounter. Ulix will definitely be bringing his Hunting Bow in future, unless Sammy LaCroix takes it for him. And I'll need to get another box of Piglets and a second War Pig... just in case! Sparks, too, if I end up getting the new master box with Zipp. Handing out Fast and Armour while also having Accomplice is great! Mei Feng was a difficult master to face, with her many movement tricks. Her reliance on Scrap Markers and Constructs made her a little predictable, but her decent speed and 3 AP means she could get where she wanted regardless if she needed to. I look forward to facing her again!
Schemes: Distract, Cursed Object
Board & Deployment:

Crews:
Gremlins:
- Ulix with Husbandry, Hunting Bow and Dirty Cheater
- Penelope
- Old Major with Corn Husks
- Gracie with Saddle
- Burt Jenkins with Dirty Cheater
- Slop Hauler
- Gremlin Taxidermist
- Four Stuffed Piglets (from the Encounter)
Arcanists:
- Mei Feng with Imbued Energies, Seismic Claw and Arcane Reservoir
- Emberling
- Joss with Imbued Energies
- Ice Gamin (Hostage)
- Fire Gamin
- Large Arachnid
- Sparks (available with his metal friend thanks to the 'Foundry' keyword)
- Mechanised Porkchop

The game began with the Ice Gamin taken hostage and strapped to four Stuffed Piglets. The Arcanists would gain a VP for every turn after the first that the Gamin survived, while my Gremlins would get a VP for every turn after the first that the Gamin was still in base contact with a Stuffed Piglet.

Ulix began by summoning three Piglets, despite a terrible starting hand. As before, these Piglets got to work setting up a triangle of Scheme Markers for Ulix to summon a War Pig later.

Gracie and Burt chugged forwards along the tracks, aiming to secure the centre, with the help of the Taxidermist's 'Never Happen' action giving Flight to Gracie, and Penelope's aura giving her an extra +1 Wk. The Taxidermist also sent one of the Stuffed Piglets forwards, exploding for 4 damage in a 1" pulse, taking a chunk of life from Sparks and the Mechanical Porkchop.
Meanwhile, the Arcanists were advancing quickly, with Sparks handing out Fast to Joss and an Accomplice activation. Mei Feng discarded Imbued Energies for Fast and teleported her way up the board with Railwalker, using the Tomes trigger to use it again and then spending her last two AP to pay Burt the Ransom, denying the Gremlins any VP from the Strategy as the Stuffed Piglets immediately disappeared!
The Ice Gamin ran away to safety, scoring 4 VP for the Arcanists over the course of the game.
Burt tried to make up for this with his Lucky Dagger but Mei Feng's defensive trigger pulled her out of his melee range. Frustrated, Burt spent his last two AP shooting at the rest of the Arcanists. Old Major walked up to the bush, giving Gracie a positive flip to charge attacks (and damage, which I forgot!) and pushing her nowhere but discarding a Rams to turn Gracie into a killing machine (+2 Damage trigger on Tusks). Gracie charged in, but didn't manage to score a kill, despite everything!
Penelope pulled Gracie back for a second charge next turn, but the Arcanists won the initiative flip and Joss, ignoring armour and Hard to Kill, decimated the poor bekettled War Pig. The Piglets got to work Distracting the Arcanists and giving the Fire Gamin a Cursed Object.
The Arcanists had been dropping Scheme Markers, one of which a Piglet ate, but another, dropped by the Large Arachnid, turned out to be for Plant Explosives - scoring 2 VP. Old Major ate the Large Arachnid as punishment.
Ulix's new War Pig charged in, causing a lot of problems for the Arcanists - especially when it healed itself to full from next to no wounds. Sparks and Joss finished it off, only for the Slop Hauler, Old Major and Ulix himself to drop enough Scheme Markers for another, and for Ulix to use his Hunting Bow to send it right back into the fray! War Pig #2 went on a stampede, taking Sparks and the Emberling before coming to a stop at Mei Feng and Joss, the smell of burning bacon in the air.
Mei Feng then disappeared into my Deployment Zone, untouchable by the many Pigs on the board, despite their many movement shenanigans and an extra turn. Too late I realised that this was for Entourage, netting the Arcanists the last VPs they needed for a win!
This was a great game, and a great Story Encounter. Ulix will definitely be bringing his Hunting Bow in future, unless Sammy LaCroix takes it for him. And I'll need to get another box of Piglets and a second War Pig... just in case! Sparks, too, if I end up getting the new master box with Zipp. Handing out Fast and Armour while also having Accomplice is great! Mei Feng was a difficult master to face, with her many movement tricks. Her reliance on Scrap Markers and Constructs made her a little predictable, but her decent speed and 3 AP means she could get where she wanted regardless if she needed to. I look forward to facing her again!
Monday, 15 August 2016
Ulix vs. Shenlong
Strategy: Squatter's Rights
Schemes: Plant Evidence, Distract
Board:
Crews:
Gremlins:
- Ulix with Husbandry and Dirty Cheater
- Old Cranky (proxied by a Hog Whisperer)
- Old Major with Corn Husks
- Gracie with Saddle
- Burt Jenkins with Dirty Cheater
- Slop Hauler
- Merris LaCroix
Ten Thunders:
Deployment:
I drew a great hand on Turn 1, getting enough high cards to get three guaranteed Piglet summons straight off the bat, which got to work setting up a War Pig for Turn 2.
Burt and Gracie charged up the left flank to secure one of the Squat Markers while the Piglets went for two more with their (0) Interact Actions. Sensei Yu contested one of these two by running up to the Piglet and pushing him away with his Wind style. Despite only having 1 AP, the Piglet charged back with Pig Charge, doing nothing but keeping the Squat Marker secure and Distracting Sensei Yu.
Sensei Yu and the Piglet fought over this marker for the rest of the game, the determined Piglet being pushed away but constantly fighting against the winds to stay contesting.
Old Major was pulled out into the open, and Sooey-ed back again, but no amount of Soulstone usage could keep him from becoming smoky bacon.
Meanwhile, the War Pig went on a minor rampage, doing some damage to the clustered Ten Thunders in the centre, and Gracie got stuck in, refusing to die. Burt, low on wounds, cheated his way back to good health with Dirty Cheater.
All the while, Merris was recklessly flying around the boardedge, taking a Squat Marker and dropping Scheme Markers next to buildings for Plant Evidence.
Gracie finally went down to a furious Shenlong, but not after healing back to full by eating a Komainu, which the Daimyo swiftly resummoned from the Scrap Marker. Ulix, with his 4" melee range, trapped a sizeable amount of Ten Thunders in combat while clinging to life, propped up by the Slop Hauler.
Shortly after, the game ended, but not before Merris had dropped enough Scheme Markers out of the reach of the Ten Thunders to secure a very narrow victory for the Gremlins!
Shifting Loyalties Campaign - Week 1
This week was the first of our Shifting Loyalties campaign!
I'm running an all-hog crew, lead my Old Major. My starting Arsenal is:
- Old Major with Corn Husks
- Gracie
- Wild Boar
- Piglet
- Piglet
Game 1: Old Major vs The Daimyo
Strategy: Reckoning
Schemes: Protect Territory, Distract
Weekly Event: Forbidden Texts
This game turned into a 6" x 6" scrum in the centre of the board pretty quickly. The Piglets grabbed themselves some Forbidden Texts with the help of Old Major's Corn Husks (renamed for this battle to 'Readin' Lessons'..), while the Wild Boar distracted the terrifying Jorogumo.
The 3" melee range on the Jorogumo meant it had a good pick of targets, and tried to maximise kills for Reckoning - but misjudged a Piglet, who killed it dead with a lucky blow!
The Daimyo summoned some Ashigaru reinforcements and the Punk Zombie held its own, but eventually became pig feed.
By the third turn or so we were down to only two models, and the game ended when Gracie and Old Major finished off the Daimyo.
The Hogs came out of their first week without a scratch, and were up a good amount of scrip from their 4 VP and three Forbidden Texts. Old Major developed an Expanded Palette, allowing him to discard corpse markers around him to heal up - which will come in handy the next time he faces the Daimyo!
I'm running an all-hog crew, lead my Old Major. My starting Arsenal is:
- Old Major with Corn Husks
- Gracie
- Wild Boar
- Piglet
- Piglet
Game 1: Old Major vs The Daimyo
Strategy: Reckoning
Schemes: Protect Territory, Distract
Weekly Event: Forbidden Texts
This game turned into a 6" x 6" scrum in the centre of the board pretty quickly. The Piglets grabbed themselves some Forbidden Texts with the help of Old Major's Corn Husks (renamed for this battle to 'Readin' Lessons'..), while the Wild Boar distracted the terrifying Jorogumo.
The 3" melee range on the Jorogumo meant it had a good pick of targets, and tried to maximise kills for Reckoning - but misjudged a Piglet, who killed it dead with a lucky blow!
(Dramatic re-enactment)
The Daimyo summoned some Ashigaru reinforcements and the Punk Zombie held its own, but eventually became pig feed.
By the third turn or so we were down to only two models, and the game ended when Gracie and Old Major finished off the Daimyo.
The Hogs came out of their first week without a scratch, and were up a good amount of scrip from their 4 VP and three Forbidden Texts. Old Major developed an Expanded Palette, allowing him to discard corpse markers around him to heal up - which will come in handy the next time he faces the Daimyo!
Subscribe to:
Comments (Atom)

